One day my buddy Marty and I got bored and instead of being destructive decided in doing something constructive. My new back yard was on my mind so together we agreed to brain storm a build of own fire pit.
When thinking about it you get nervous because a lot of concerns pop up like… cost? amount of hours of work? should I pay a professional? Where do I find the stone needed? Placement? What shape? size? look?
So we put our thinking caps on and began some research and came to the same conclusion…. It is far easier than you would expect.
For placement I decided a distance no closer than 15 feet to the house, close to a water source and away from any trees that would have the potential of catching fire. I also didn’t want it too close to the table in the patio because no one wants to eat next to a rippin and roaring fire that kicks out tons of smoke and heat.
Next the stone. I priced out stone all over and for a quick do it yourself Home Depot did the trick. I went to local places, but the cost for the stones I got are so close plus you can purchase extra and if you want or need to return them they take them back with no questions asked. Also here I was able to pick and choose what stones I like with no imperfections or stains.
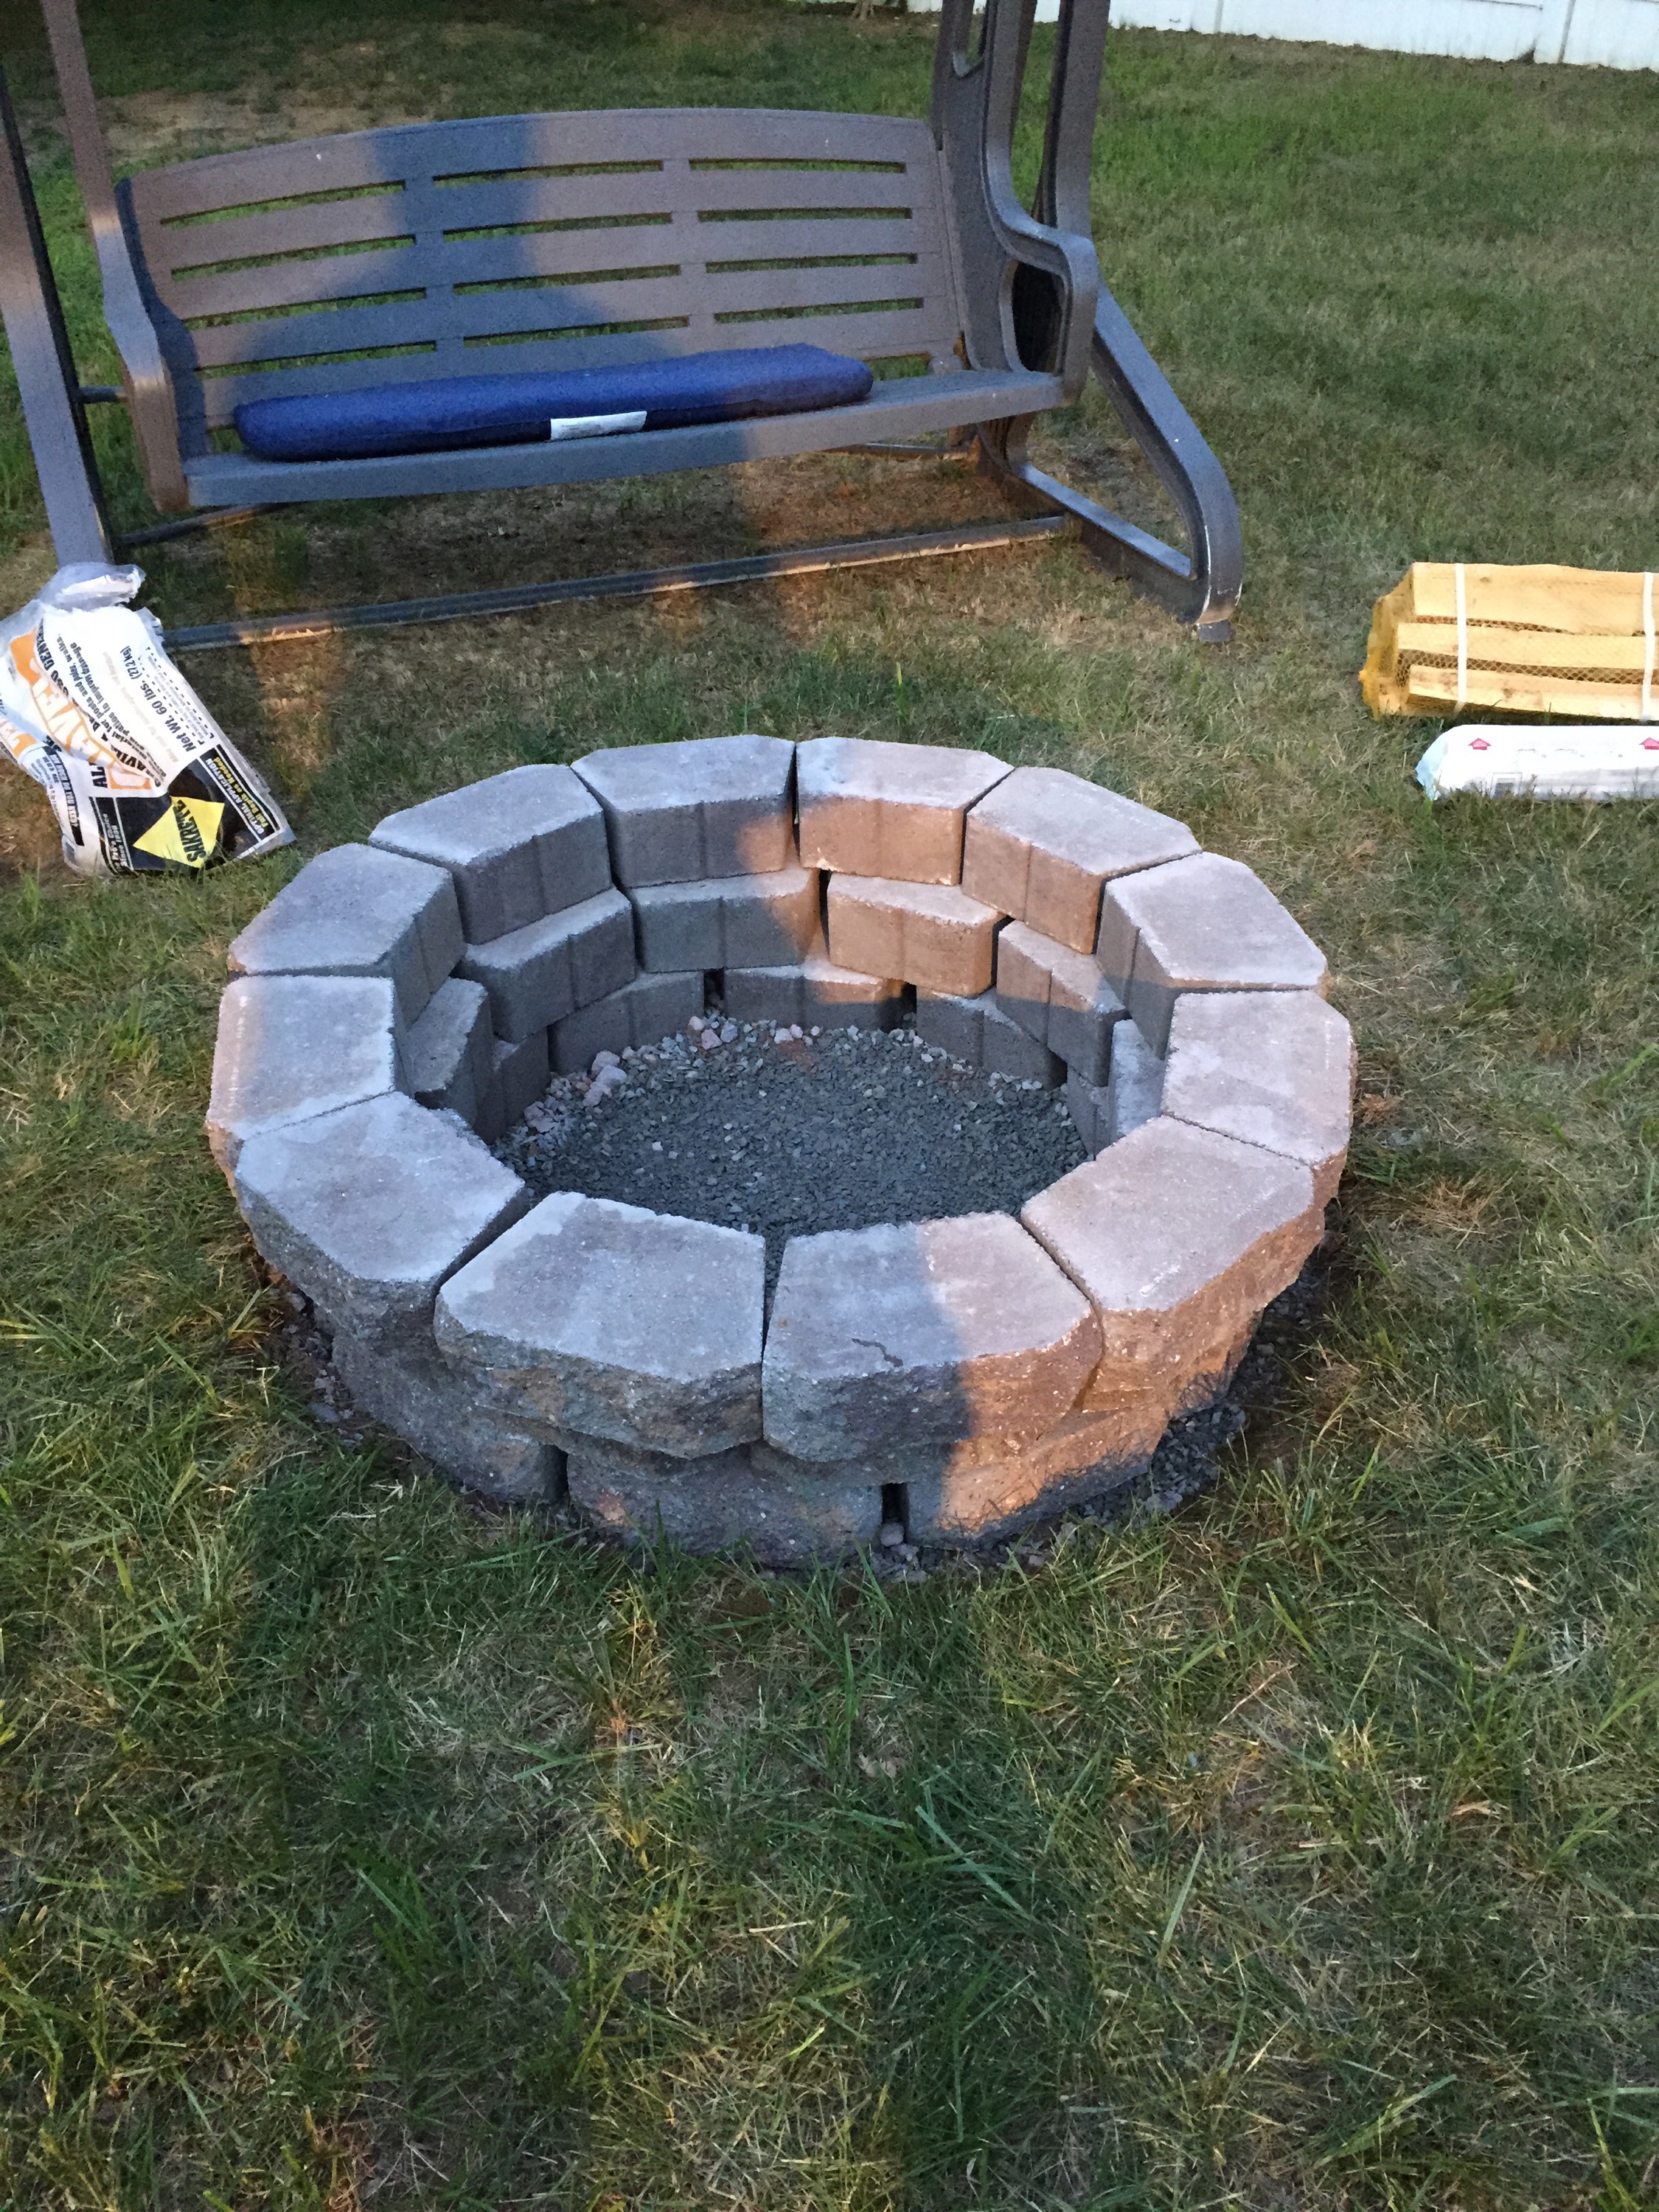
Now it’s time for the shape and size. Right at the store I placed the stones and began shaping out my desires size. Started with a 10 stone circumference then went larger then added additional layers. Are one point I had it four layers deep and thought to myself, it looks great but how are you going to see in when you are sitting plus it looks kinda like a Well. So we kept it to 3 blocks in height.
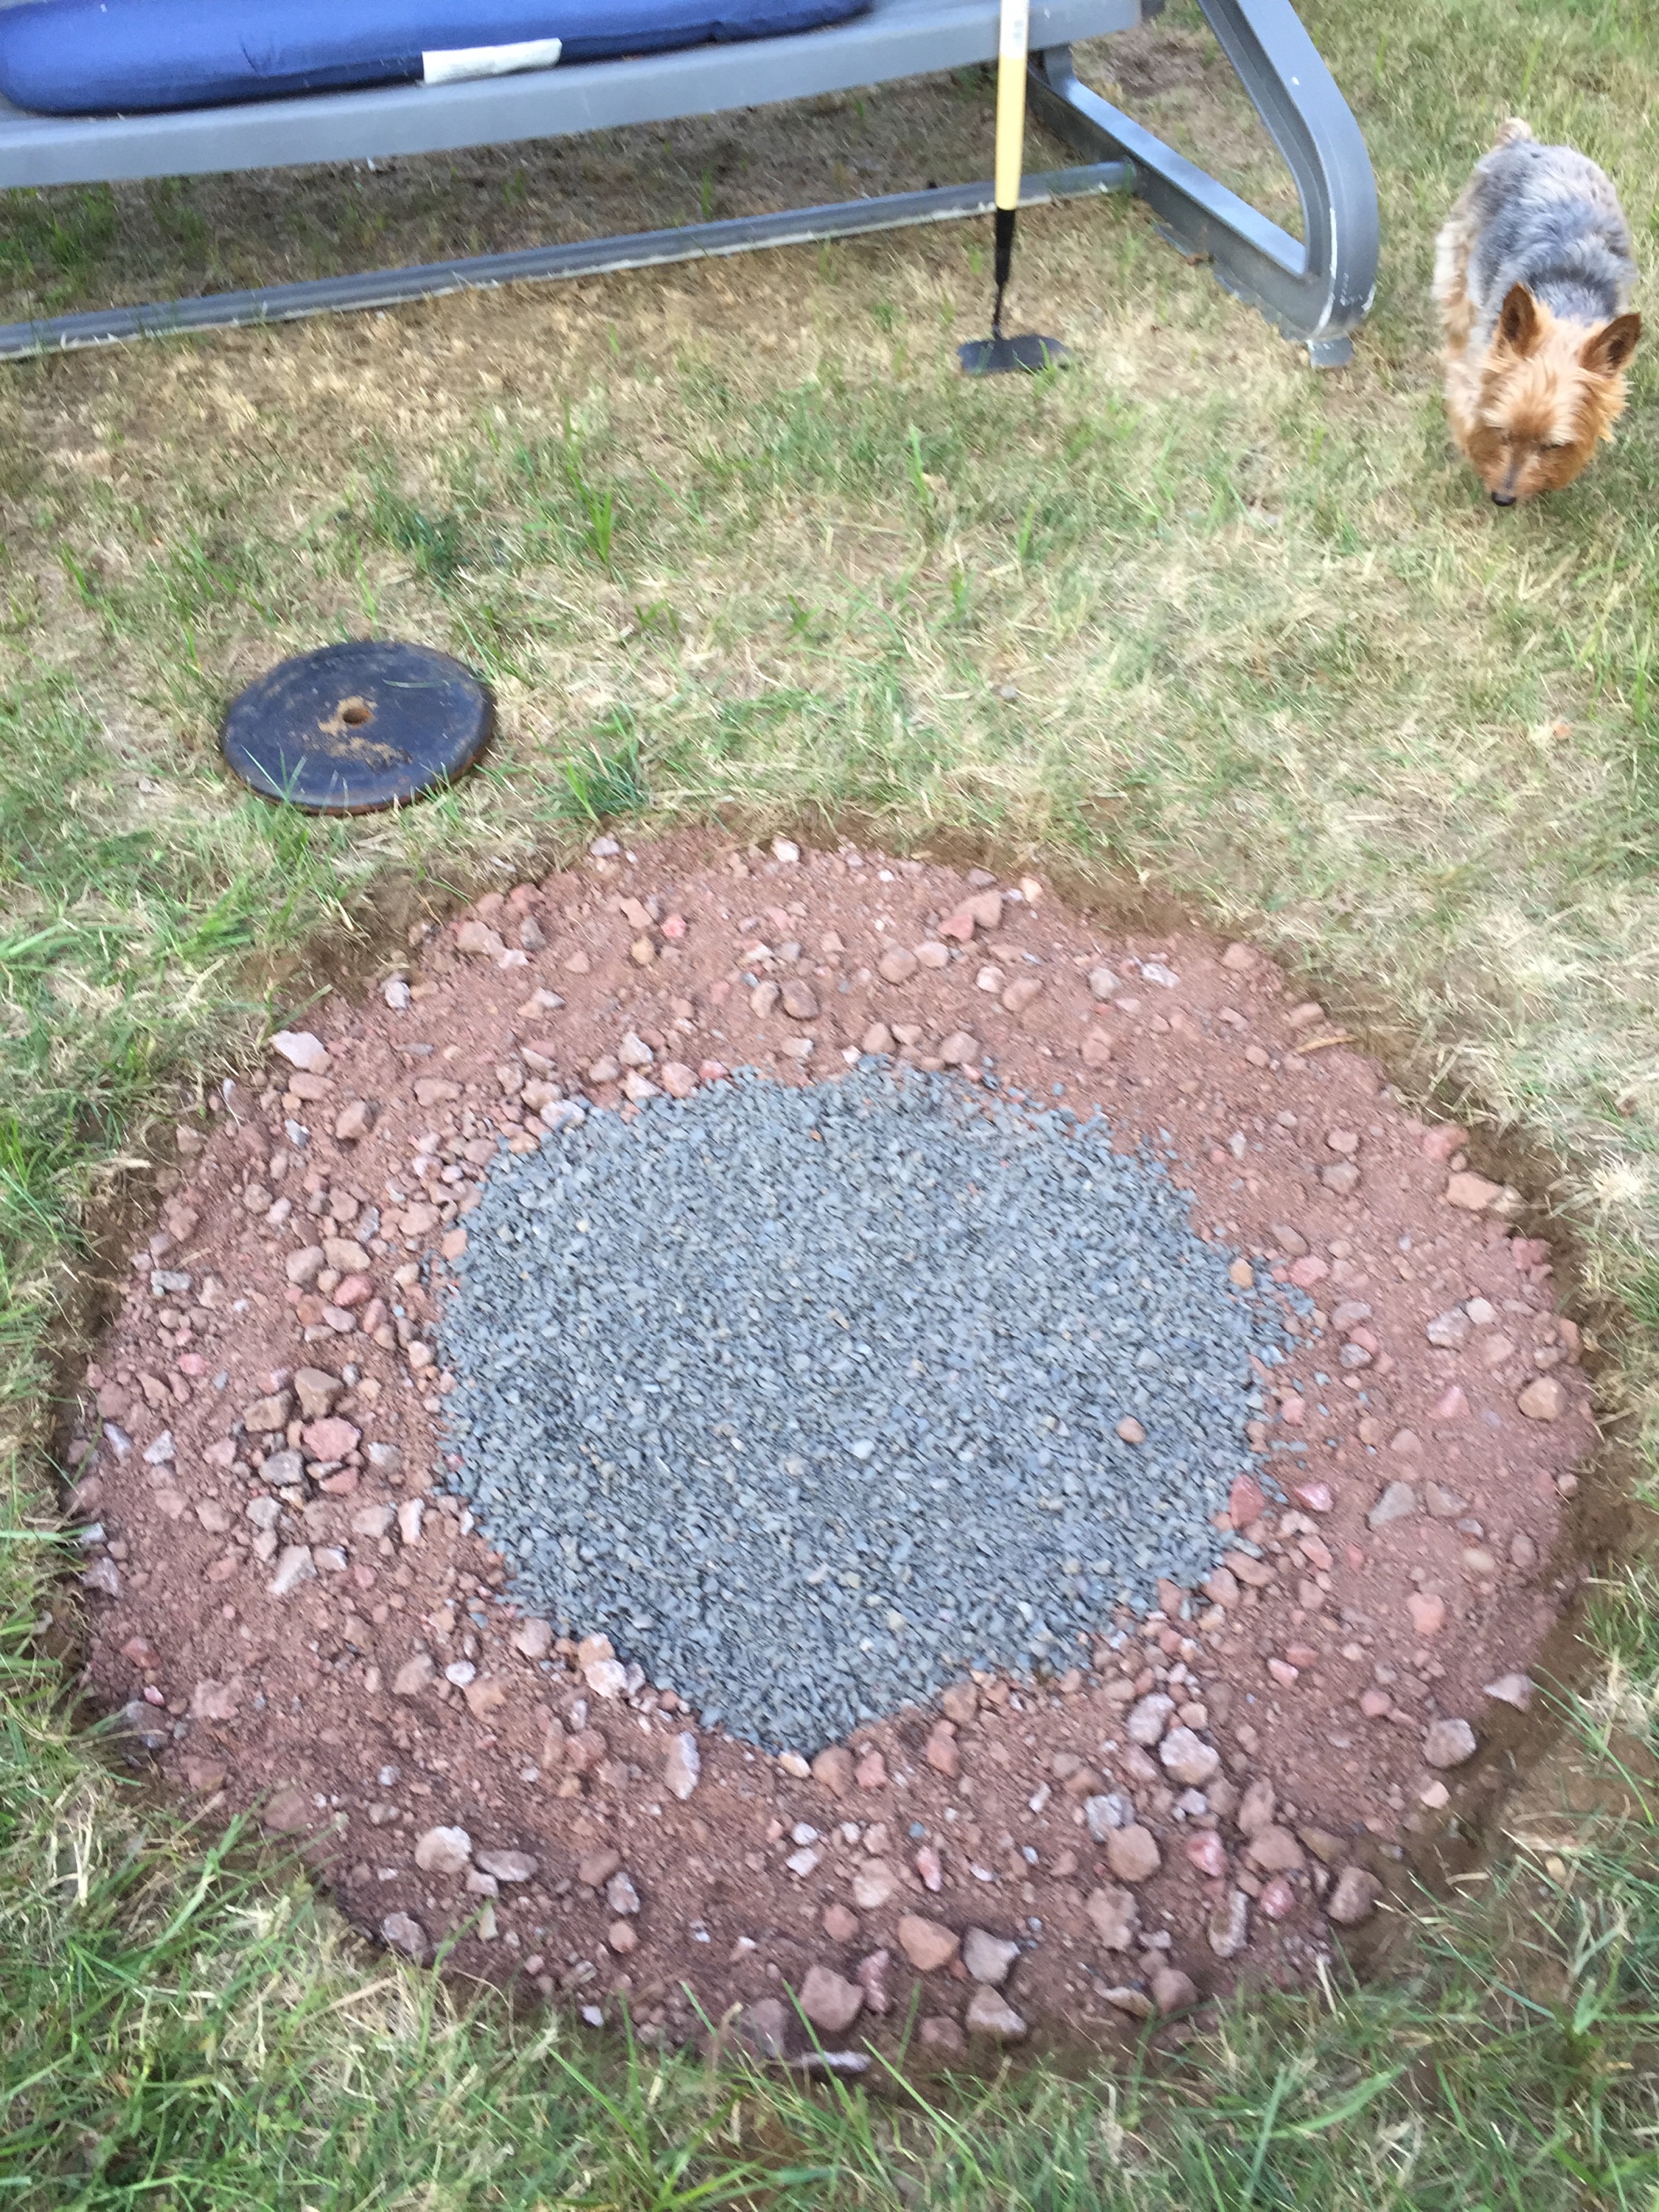
For the foundation I found some stone that the Home Depot sells that is made for the foundation of a fire pit. They seem a little more brittle so they can crush a little when placing the stones and leveling them. Then I found a blue stone for the center to prevent grass and weeds to grow. I could have just purchased all of the support stone, but the blue stone was slightly cheaper.
The helper at the store sold me on the mason glue that is made to have the blocks stick together. It actually works great. This glue isn’t necessary but it does hold your creation together pretty well.
After getting everything packed in the trunk we headed to the job site. Here we laid then blocked exactly where we wanted hem one level thick to find the exact circumference. Get the shovels out and start digging. I dug about an inch to two inches deep. Also, I pulled a tarp over and put all of the dirt that I dug up on it. I used the extra dirt to fill some uneven land I had on the property.
Once your spot is dug correctly….packed..I packed it with my stomping and with the weight I had ….And leveled…I leveled it with a standard level, now you can put your support stones around the boarder and the blue stone in the center.
Now build and secure each stone and make sure they are each seated correctly. Don’t have them wabble or sit uneaven. Marty and I placed the stones in a way where I would get some ventilation and spacing between the lower levels. This helps the fire breathe. For the top layer, I did not want any spacing, but when butting the blocks against each other tightly you will find that you will need to add another block to complete the circle. Also I wanted to have a little lil effect at the top to add and little styling to it. I used 12 blocks for the top layer and 10 for the middle and bottom.
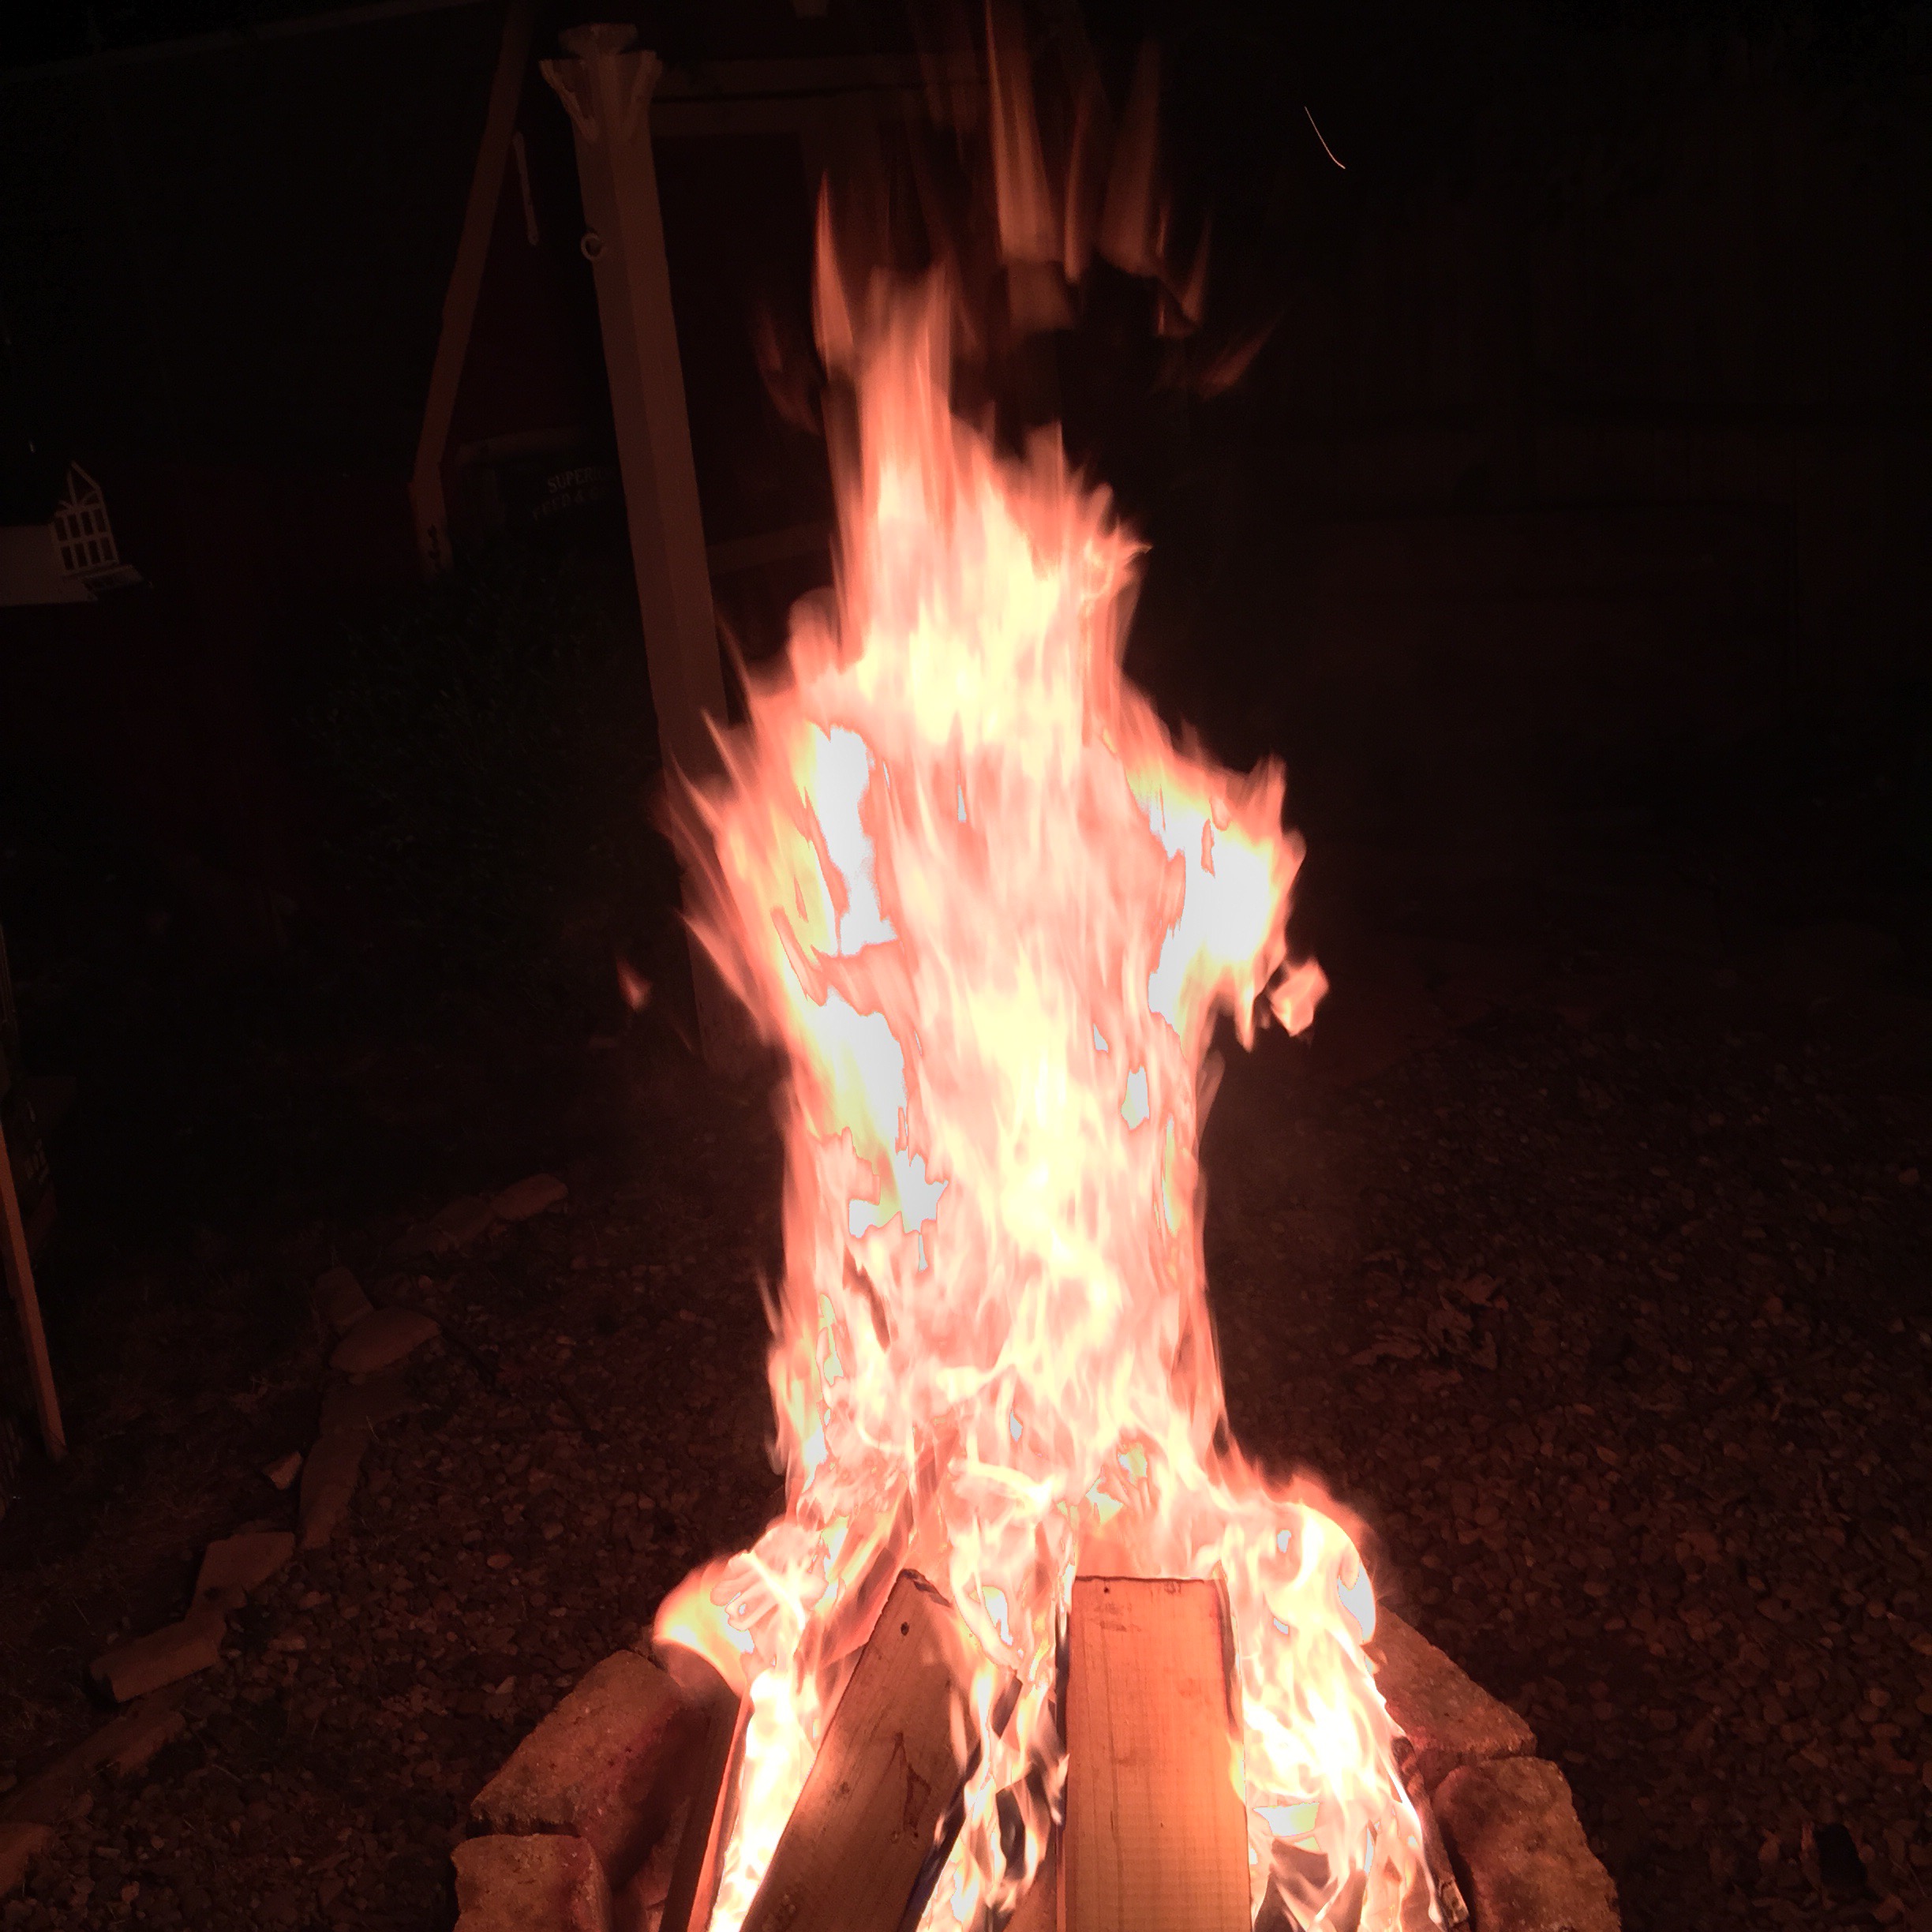
When all said and done time to light the Fire!

